Développeur>Tutoriels>Contrôle d’une led avec MIT App Inventor
Un tutoriel pour contrôler une led avec une application Android.
Vous avez besoin :
- Une carte Esus,
- Une led + résistance,
- Un smartphone sous Android.
Le schéma
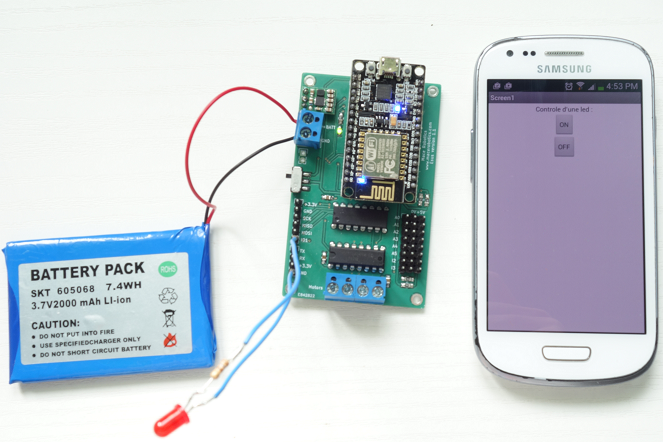
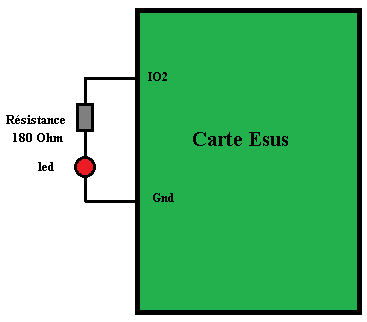
Voici le schéma, une led est brancher entre le Gnd et la sortie IO2.
 Le programme pour la carte Esus
Voici le programme pour le microcontrôleur ESP8266 :
#include <ESP8266WiFi.h>
#include <esusBoard.h>

const char* ssid = "your_SSID";
const char* password = "your_PASSWORD";

int ledPin = 2;
WiFiServer server(80);

// adresse IP
IPAddress ip(192, 168, 1, 13);
IPAddress gateway(192,168,1,1);
IPAddress subnet(255,255,255,0);

void setup() {

 // initialisation de la carte Esus
 initEsusBoard();

 Serial.begin(115200);

 // initialisation de pin IO1 en sortie
 pinMode(ledPin, OUTPUT);

 // Connexion au réseau Wifi
 Serial.println();
 Serial.println();
 Serial.print("Connecting to ");
 Serial.println(ssid);

 WiFi.begin(ssid, password);
 WiFi.config(ip, gateway, subnet);

 while (WiFi.status() != WL_CONNECTED)
 {
   delay(500);
   Serial.print(".");
 }

 Serial.println("WiFi connected");

 // démarrage sur serveur
 server.begin();

}

void loop()
{
WiFiClient client = server.available();

  while(client != true)
  {
    client = server.available();
    Serial.println("Attendre client...");
    delay(100);
  }

  Serial.println("connexion client");
  while(!client.available())
  {
    delay(1);
  }

  String request = client.readStringUntil('\r');
  Serial.println(request);
  client.flush();

  // réception d'une commande ON
  if (request.indexOf("/CMD=ON") != -1)
  {
    Serial.println("ON");
    digitalWrite(ledPin, HIGH);
  }

  // réception d'une commande OFF
  if (request.indexOf("/CMD=OFF") != -1)
  {
    Serial.println("OFF");
    digitalWrite(ledPin, LOW);
  }

  Serial.println("Client déconnecter");
  Serial.println("");

}
- Modifier votre SSID et password :
const char* ssid = "your_SSID";
const char* password = "your_PASSWORD";
- Ensuite vous pouvez compiler et télécharger le programme dans la carte Esus.
L’application Android
Maintenant, nous allons réaliser l’application Android grâce à App Inventor développé par Google et basée sur une interface graphique similaire à Scratch.
- Rendez-vous ici : http://appinventor.mit.edu/explore/
- Crée un nouveau projet : Led_control
- Vous devez arriver sur l’interface de votre application :
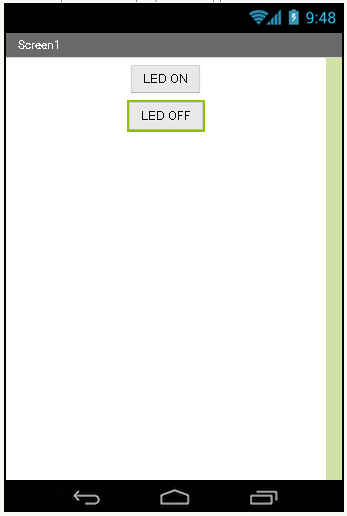
- Alignement horizontal de l’interface : centrer
- Ajouter un bouton :
- Modifier le texte du bouton : LED ON
- Ajouter un deuxième bouton avec : LED OFF
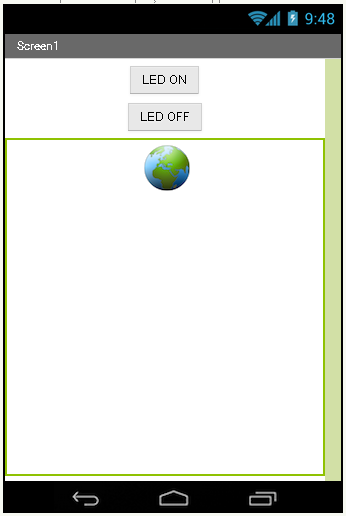
- Ajouter l’Afficheur Web :
- Rendre l’afficheur web non visible
Réalisation des blocs :
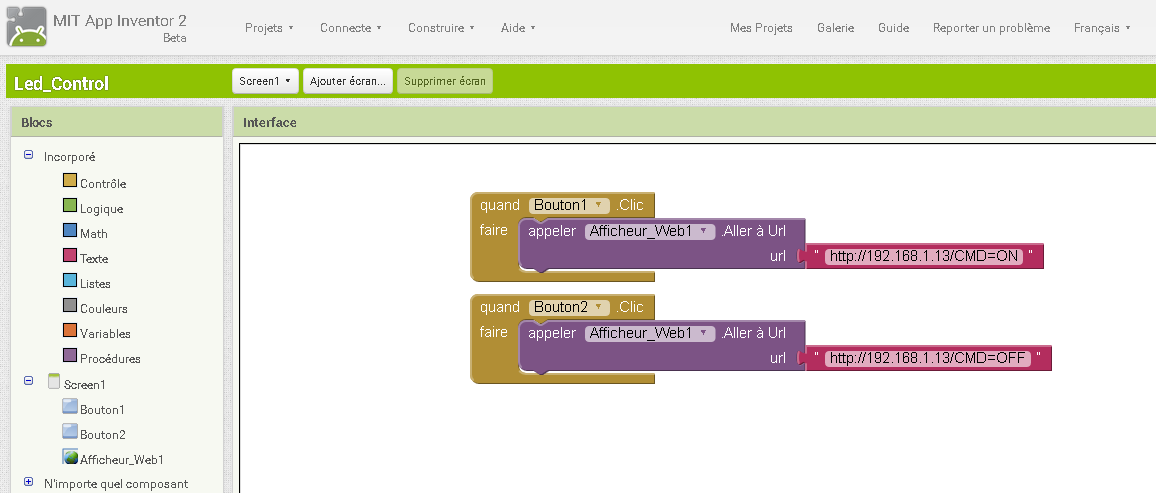
- Voici le programme en bloc pour la gestion des deux boutons :
- Un bloc pour la gestion du bouton ON et un autre pour le bouton OFF
Construction de l’application
- Construction de l’application sur votre ordinateur :
- Transférer l’application sur votre smartphone.
- Autoriser l’installation de l’application sur votre téléphone.
Fin du tuto !


