Date mise à jour : 05/05/2019
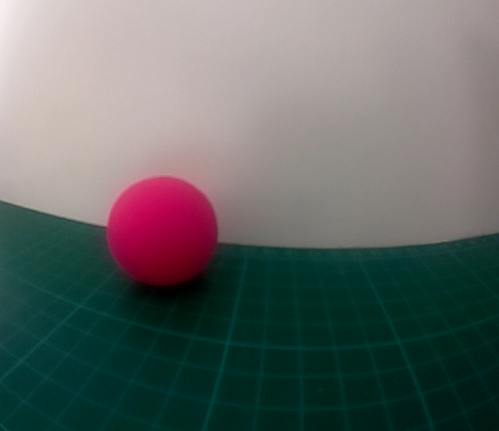
Ce tutoriel permet de faire du tracking d’une balle de couleur avec le robot MRPiZ et une caméra Raspberry Pi. Tutoriel réalisé en langage Python et la librairie OpenCV.

Le matériel nécessaire pour le tutoriel :
- Un robot MRPiZ (https://shop.macerobotics.com)
- Un support caméra pour le robot MRPiZ
- Une caméra Raspberry Pi 8MP
- Une balle colorée
Ce tutoriel utilise une balle de couleur rose.
Initialisation de la camera
Initialisation de la résolution de la caméra Raspberry Pi et de la frame rate.
#!/usr/bin/python
from mrpiZ_lib import *
from picamera import PiCamera
import cv2
from picamera.array import PiRGBArray
import time
import numpy as np

# definition des resolutions de la camera
_RESOLUTION_LARGEUR = 800
_RESOLUTION_HAUTEUR = 512

print "Exemple de tracking de balle rose"

camera = PiCamera()

# resolution de la camera
camera.resolution = (_RESOLUTION_LARGEUR, _RESOLUTION_HAUTEUR)

# frame rate
camera.framerate = 32

# Tableau RGB en 3D de la capture.
rawCapture = PiRGBArray(camera, size=(_RESOLUTION_LARGEUR, _RESOLUTION_HAUTEUR))

time.sleep(0.1)
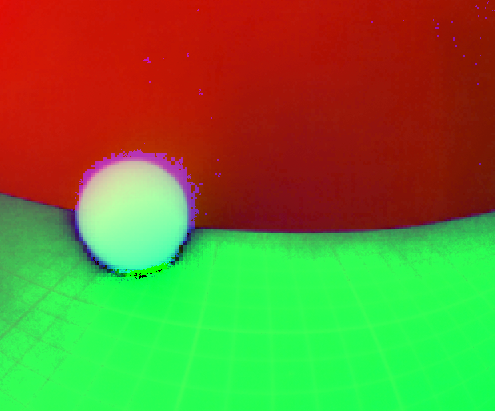
Conversion de l’image en HSV
Conversion de l’image capturé en Hue, Saturation, Lightness soit la teinte, saturation et lumière:
#!/usr/bin/python
from mrpiZ_lib import *
from picamera import PiCamera
import cv2
from picamera.array import PiRGBArray
import time
import numpy as np

# definition des resolution de la camera
_RESOLUTION_LARGEUR = 800
_RESOLUTION_HAUTEUR = 512

print "Exemple de tracking de balle rose"

camera = PiCamera()

# resolution de la camera
camera.resolution = (_RESOLUTION_LARGEUR, _RESOLUTION_HAUTEUR)

# frame rate
camera.framerate = 30

# Produces a 3-dimensional RGB array from an RGB capture.
rawCapture = PiRGBArray(camera, size=(_RESOLUTION_LARGEUR, _RESOLUTION_HAUTEUR))

time.sleep(0.1)

try:
  # capture de la camera
  for frame in camera.capture_continuous(rawCapture, format="bgr", use_video_port=True):

  image = frame.array

  # clear the stream in preparation for the next frame
  rawCapture.truncate(0)

  # Conversion en HSV
  hsv = cv2.cvtColor(image, cv2.COLOR_BGR2HSV)

  print "capture"

except:
  stop()
Application d’un masque de couleur et trouver le contour
Application d’un masque rose pour extraire la balle de l’image.
- Définition du masque pour la couleur rose :
# definition HSV de la couleur rose (valeur haute et basse)
upper_pink = np.array([200,255,255])
lower_pink = np.array([130,100,100])
- Comment trouver les valeurs HSV du masque ?
Exemple pour la couleur verte :
>>> vert = np.uint8([[[0,255,0 ]]])
>>> hsv_vert = cv2.cvtColor(vert,cv2.COLOR_BGR2HSV)
>>> print hsv_vert
[[[ 60 255 255]]]
Il est nécessaire d’utiliser la fonction cvtColor()
Source : https://docs.opencv.org/3.0-beta/doc/py_tutorials/py_imgproc/py_colorspaces/py_colorspaces.html
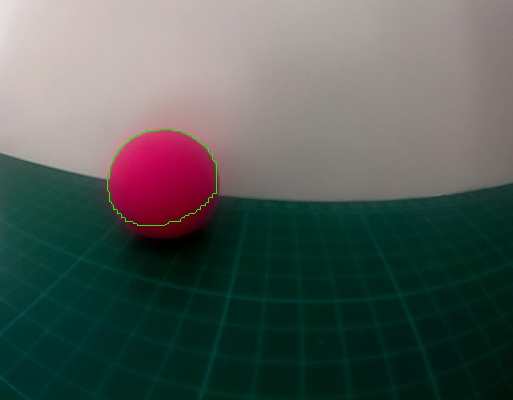
- Ensuite, trouver le contour avec le masque de couleur, utilisation de la fonction findContours :
# trouver le contour
cnts = cv2.findContours(mask.copy(), cv2.RETR_EXTERNAL,cv2.CHAIN_APPROX_SIMPLE)[-2]
center = None
- Dessiner le contour avec la fonction drawContours() :
cv2.drawContours(image, cnts, -1, (0,255,0), 1)
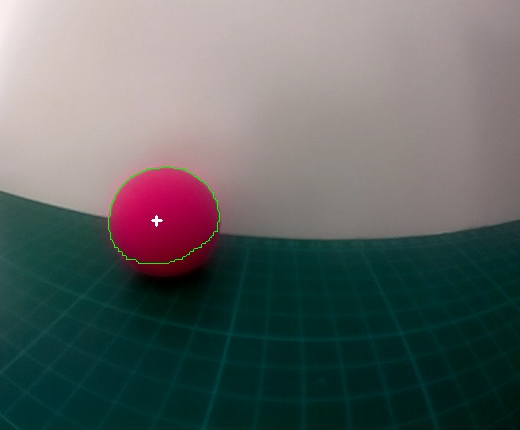
Centre du contour
Calcul du centre du contour:
if len(cnts) > 0:
  print "contour trouver"
  c = max(cnts, key=cv2.contourArea)
  ((x, y), radius) = cv2.minEnclosingCircle(c)
  M = cv2.moments(c)

  # calcul du centre
  center = (int(M["m10"] / M["m00"]), int(M["m01"] / M["m00"]))

  print "Position X = ", center[0]
  positionX_rose = center[0]

  print "Position Y = ", center[1]
  positionY_rose = center[1]
- Ajouter du texte au centre du contour avec la fonction putText :
cv2.putText(image, "+", (center[0], center[1]), cv2.FONT_HERSHEY_SIMPLEX, 0.5, (255, 255, 255), 2)
Le code complet :
#!/usr/bin/python
from mrpiZ_lib import *
from picamera import PiCamera
import cv2
from picamera.array import PiRGBArray
import time
import numpy as np

# definition des resolution de la camera
_RESOLUTION_LARGEUR = 800
_RESOLUTION_HAUTEUR = 512


# definition HSV de la couleur rose (valeur haute et basse)
upper_pink = np.array([200,255,255])
lower_pink = np.array([130,100,100])


print "Exemple de tracking de balle rose"

camera = PiCamera()

# resolution de la camera
camera.resolution = (_RESOLUTION_LARGEUR, _RESOLUTION_HAUTEUR)

# frame rate
camera.framerate = 30

# Produces a 3-dimensional RGB array from an RGB capture.
rawCapture = PiRGBArray(camera, size=(_RESOLUTION_LARGEUR, _RESOLUTION_HAUTEUR))

time.sleep(0.1)

try:
  # capture de la camera
  for frame in camera.capture_continuous(rawCapture, format="bgr", use_video_port=True):

    image = frame.array

    # clear the stream in preparation for the next frame
    rawCapture.truncate(0)

    # Conversion en HSV
    hsv = cv2.cvtColor(image, cv2.COLOR_BGR2HSV)

    # construction du masque rose
    mask = cv2.inRange(hsv, lower_pink, upper_pink)
    mask = cv2.erode(mask, None, iterations=3)
    mask = cv2.dilate(mask, None, iterations=3)

    # trouver le contour du masque
    cnts = cv2.findContours(mask.copy(), cv2.RETR_EXTERNAL,cv2.CHAIN_APPROX_SIMPLE)[-2]
    cv2.drawContours(image, cnts, -1, (0,255,0), 1)
    center = None

    if len(cnts) > 0:
      print "contour trouver"
      c = max(cnts, key=cv2.contourArea)
      ((x, y), radius) = cv2.minEnclosingCircle(c)
      M = cv2.moments(c)

      # calcul du centre
      center = (int(M["m10"] / M["m00"]), int(M["m01"] / M["m00"]))

      print "Position X = ", center[0]
      positionX_rose = center[0]

      print "Position Y = ", center[1]
      positionY_rose = center[1]

      cv2.putText(image, "+", (center[0], center[1]), cv2.FONT_HERSHEY_SIMPLEX, 0.5, (255, 255, 255), 2)

  else:
    print "pas de contour"
  print "capture"

except:
  stop()
Fichiers sources :https://github.com/macerobotics/MRPiZ/tree/master/Software/Python/tutorials/OpenCV/tracking
Fin de la première partie pour le tracking d’une balle coloré.
Sources : https://docs.opencv.org
